Pages

Training the Mind of the Horse and Rider

Training the Mind of the Horse and Rider
Click on Logo (Original artwork by Lanie Frick for Messick Quarter Horses. Not permitted to be copied)

Tuesday, June 29, 2010

Savannah

I just purchased Savannah, a 4 year old Palomino TWH (Tennessee Walking Horse).

I love her head - pretty eyes, alert ears, and beautiful head.


Well porportioned. It doesn't look like it here, but her hip is big and muscular.


Sorry she is a little dirty on this side.


She is inquisitive. Doesn't she have a pretty head?


Her body is dappled, her mane is light, and her tail is long.


I love her eye.


It is so kind and peaceful.

Sunday, June 27, 2010

Memory/Tribute Book

I've been thinking of something since Finny died, and I'm still thinking of this, so maybe it is time to do something now. I was thinking of putting together a tribute book. A tribute to the ones we loved and lost. A collection of stories of our horses, what they meant to us. Special horses come and go, sometimes they die and sometimes we have to sell them, and sometimes they belong to someone else and one day they are gone.

Whatever the situation, if you would like to have your story in a memory book, send your story to me with your permission to reprint. I think I am ready to do this, as this part of my journey will help me to heal.

hugs, everyone.
I don't know what is wrong with my these days.
Hormones and Menopause are doing a number on me! That along with lack of a good night sleep.

All I know is that I have to "Embrace the Journey!"
Brenda

Thursday, June 24, 2010

Shaggy in Colorado

The Centered Riding Update Clinic. Enjoy the pics!


Our Centered Riding Clinic in Steamboat Springs, CO. Beautiful country!


Shaggy in the outdoor arena. Memories of Finny in the same arena come flooding back.


Shaggy is so quiet at the clinic. It is amazing. This is the first time that he has been off the place.


What an arena! Dressage barn with mirrors! But what makes it wonderful is the people! Regina is the perfect hostess. What I love about her is how much she is willing to share, and how much she wants to!


Danicng Knees, but I could have had them bent more,


Sitting the trot down the rail,


Relaxed,


Arena of my dreams!


Bending very nice!


Collecting at the trot,


Trot to Walking transitions,


Posting Trot, and showing off some muscle,


Bending in a Figure 8 Circle,


and finally, the lope departure,

Wednesday, June 23, 2010

Playing with the Grandbabies


or should I say Grand-toddlers? My, they aren't babies anymore. Makenzie and Caden are 18 mo old. I truly enjoyed babysitting them last Friday morning when I was in Colorado.


Sitting and reading books and playing with cars,


Caden with his truck,


Makenzie with her truck,


Makenzie loves the phone,


and she is trying hard to call someone.


Caden loves playing with everything with tires,


but now he is starting to get tired.


Time to go inside.

Tuesday, June 22, 2010

Riding "Pody"

Two weekends ago, I took the mini, that Sara found, out to Colorado. Makenzie couldn't wait to see her "Pody" each day from the dinette windows. The rainy weather kept her from riding when her mommy got home from work each day that first week. I was able to stay with them the following Friday and Saturday, after my Centered Riding Clinic. Uncle Jacob, Aunt Amber and cousin Caden came out to spend the weekend, too. I had to leave on Saturday, so I could spend Father's Day Sunday with "Pop". But Saturday morning, we got Pody out for the first time.

Finally, Makenzie's mini "Pody" gets his first rides. Makenzie can't wait to help,


but Caden would rather play with the gravel.


Makenzie gets her grooming tools.


Makenie grooms her pony with her mommy,


"The saddle is on, but we need to tighten the girth, Mommy".


We have put on our new helmet!


Makenzie rides,


Caden loves to pet Grandma's horses, but he isn't too sure about riding yet.


Hi Grandma, I'm riding my Pony!


I'm glad, Makenzie, and we'll work on Caden! Maybe next year, there will be a pony at Grandma and Pop's house, too.

Sunday, June 20, 2010

Centered Riding Update Clinic Day 4

June 17, 2010

Day 4 was the last day of the Update Clinic. With all the preparation work for the canter, today was canter day. Shaggy needs to be able to pick up the canter without trying to trot faster and faster, and falling into the lope.

We did cavelletti work. We walked and trotted over 3 logs laying on the ground from both directions. Then we raised the logs by sitting them on another log and placing them about 4 ½ feet apart. We trotted these logs, asking the horse first to extend the trot. Then the logs were put closer together, and we worked on going over the logs in a collective trot.

Building on the previous day, we worked on the walk to trot to walk transitions. The horses needed to move out to the trot on the first stride. Two logs were placed together on an angle on one of the corners. As the horses trotted up to the logs, we were to ask for the canter right before the horse took the stride to go over the log. Shaggy spooked as her neared the logs for the first time at the trot, so we walked up to and over them in both directions. We trotted the log first, then at the next trot time, we asked for the canter. We were successful in getting both canter leads.

I had Susan sign my Centered Riding book. She is a gifted artist. Along with signing my book, she drew a picture of me riding Shaggy. What a wonderful memory.

I spent Friday evening through Saturday noon with the 2 grandbabies. Jacob, Amber and Caden came out to visit while I was there. The 2 little ones hadn’t seen each other since Christmas. I had a fabulous time. Makenzie and Caden got to ride her “Pody”. I’ll post Pony and Play time photos soon.

Thursday, June 17, 2010

Centered Riding Update Clinic Day 3

June 16, 2010

Day 3 was preparation for the canter or lope. This is the point of where I am at in Shaggy’s training. We continue with the walk-trot-walk transitions. Building on transitional work is the key to moving towards higher levels of maneuvers.

Walk to Trot and back to Walk transitions prepares the horse to move out. This causes the horse to start thinking about when the transition is coming. We work the body and the mind of the horse by varying transitions. We move from the walk to the trot within a few walk steps. Trot, come back to the walk for 2 walk steps, and trot again.

We can also move the horse out by thinking about and by moving our center while we pedal backwards in the Following Seat. If we want the horse to move out more briskly, we want that center to grow and spin larger. We grow up and that helps the horse to stay light in the front end also. If we want the horse to move slower, we spin our center smaller and slower.

Through a lot of transitions into the trot and back to the walk and stop, the horse becomes lighter on the front end. The horse becomes springier in the trot. The lope departure becomes easier as the horse becomes lighter on his front end, deepens his hind end motion, and springs into the lope.

We don’t ask for the lope until walk trot transitions come easily, and the horse springs into the trot. We vary the asking by increasing or decreasing the number of steps between the walk and trot. We add maneuvers and patterns to the work out, keeping the horse always thinking.

The last day of the clinic should be about building on the lope departure. The fourth day is here already. It is exciting when time flies like this and we have so much fun while learning!

“Embrace the Journey!”

Tuesday, June 15, 2010

Centered Riding Update Clinic Day 2

Can you believe that it is the middle of June already? Summer is here now, as it is sunny 70 in CO at my clinic. I had my trailer windows open as I made supper, and even now as I’m enjoying a cup of coffee while I blog. Shaggy is eating some hay, and I will go check him and clean his stall in a little bit, but first I want to share about my day.

I am having such a good time here. Relaxed. No pressure to meet any guidelines or to pass any level. This is a time to learn more, apply what we are learning and go home with more “tools in the toolbox.” We are learning a few more Centered Riding techniques and exercises. We are applying what we are learning in 2 ways. First we teach a 45 minute class to 1 or 2 students, instructing them with any Centered Riding basic and exercises that we think will help the students that we have. Then after the teaching sessions, we ride. Today was an 1 ½ hour instruction by Susan, a Level 4 Centered Riding instructor.

I asked Susan how she knows something is enough when she does body work or is having the rider do something. She said to me that just her years of experience have given her a precision of knowing what to do and when. And it shows. She can see what is happening with a horse or with the rider, and she knows exactly what to say to the rider to see an improvement in the rider/horse relationship.

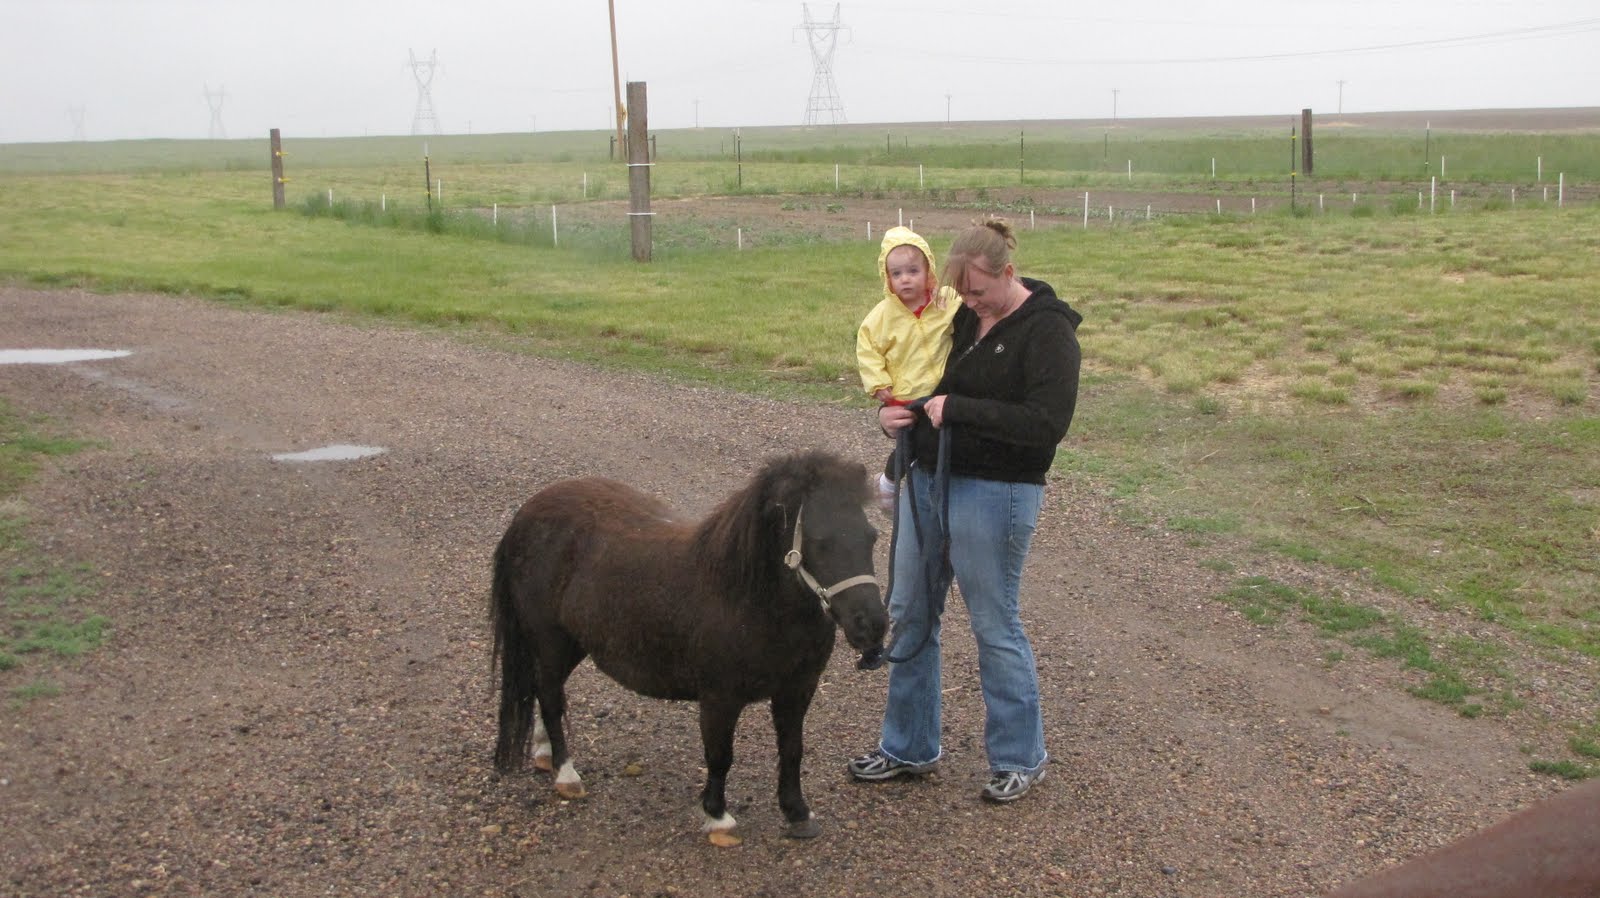
I am so glad that I came with Shaggy. He is being excellent! I can tell that we are improving in our relationship. He is starting to feel my body movements and to know what they mean. As I do the “Following Seat“, he moves in a deeper stride. If I half halt, he hesitates. We half halted to the stop and he began to stop. He is moving off my legs, without spurs which I have never used with him, and he is staying straighter down the long side of the arena.

Shaggy has definitely deepened his stride with 4 exercises that helped to get the horse’s back up. First, using the “Following Seat” and other exercises, his legs reach under him as I follow his movement with my hips, allowing him to be freer through his shoulders and his body. He is staying light and lifting his shoulders. This is happening because I am riding with my center and moving my hips freely as he moves.

Second, in the “Posting Trot“, we use our outside leg back and deepen our heel at the down movement of the trot, which is when we sit the trot. We move into the “3 Seats at the Trot”. We post 6 strides, 2-point 6 strides and sit 6 strides, then repeat the sequence. When we 2 point, we do the “Dancing Knees” exercise, allowing the hip, knee and ankle joints to relax and feel the movement of the trot. When we sit, we sit with control. We sit lightly into the saddle by first starting to sit, then opening up our knee which takes our knee off the horses and then sit. By doing the sit part of the 3 Seats at the Trot lightly, we are able to sit the trot without hurting the horse’s back with bouncing.

Lastly, we did Half Halts at the walk to stop the horse. We think about our Center and having our center deep. Then we grow with the horse, but we don’t think about growing up. Think about growing down, like the roots of a tree. Another way to Half Halt to the stop is to bring our center down, then think of letting go of a balloon from our head. Don’t allow the body to straighten too much, just think lightness. We finished the exercises by asking for a stop at the trot by using the Half Halt.

I was almost ready to lope Shaggy as his movements were beautiful. He was giving to the bit. At the end of our lesson time, I could tell that he was tired though. He did want to grab at the bit. I asked him to continue to stay straighter going down the rail and moved his ribcage back over to the rail when he wanted to come off the rail. I wanted to end on a good note, and I didn’t want to move him into the canter, which seemed like it would have been effortless, if I didn’t have time to correct anything that went wrong.

I did turn Shaggy out in the outdoor arena while the next group had their lesson. I brought him in at the end of the day for some hay and water. I saddled him, put him into a D ring snaffle instead of the short shank, broken mouthpiece, (which has a covered hinge), that I had been riding in. I knew tomorrow it was time to take my Centered Riding exercises and apply them to the lope. What better way to improve his lope than when I am being instructed by a very knowledgeable Centered Riding instructor.

I warmed Shaggy up with some walking, using the Following Seat. I trotted him, both while posting and while 2 pointing. I practiced the half halt stops at both the walk and trot. When I felt that he was relaxed, and half halted him, I asked for the lope with my center. I maintained light contact on his mouth, mainly for speed control at first. But I left go of contact as I wanted Shaggy to know that it was ok to lope freely with a rider. Using half of the arena, after 2 or 3 circles, he settled down into a nice lope speed. I stopped, reversed, and went to the right, which is harder for him to stay in the lope. This was also the direction that he would come off the rail at the trot. I asked for the lope and I left him go faster. At home, I had trouble keeping him in the lope, so I wanted him to lope at the speed that he is comfortable. I stopped him, then went right into a free moving walk, using the Following Seat. This way, he knew that loping could end and be relaxing!

I know at times I hold too lightly on the reins for contact. I have control, but I need to tell my horses to move back into straightness sooner and with more exact pressure when they don’t stay straight. That is what I am taking away from today’s lesson.

The lesson felt good. After an in depth lesson like this, I have never re-saddled my horse to ride again. Today, I couldn’t wait to get back on Shaggy and practice a little. I want to prepare both him and myself for tomorrow. We both can be relaxed going into the lope transitions.

What a journey this is starting to be. As I have started this journey a year ago, it is still new and fresh for me. Now I am starting a fairly young horse and teaching him correctness and straightness. Shaggy and I are both starting together at the same level.

I will “Embrace the Journey!” with him.

Monday, June 14, 2010

Centered Riding Update Clinic

Day 1

Another June finds me in Steamboat Springs, Colorado for a Centered Riding Clinic. Last year, I was here in June and in August, completing my Level 1 Instructor’s Course with Peggy Brown. This Update Clinic is instructed by Susan Harris. This is 1 of 2 Update Clinics that I will need before August of next year to be able to apply for Level 2 Centered Riding Instructor.

Last year, I had Finny here. I still miss here dearly, and I will always miss “what could have been“. I was so looking forward to where Centered Riding could have taken Finny and I towards a wonderful partnership. We had bonded so well during those summer months of last year, when I started my Centered Riding journey. He was riding beautifully and I was having so much fun with him.

This year, I have Shaggy here. I have raised Shaggy, and from the time we was a weanling, I have always admired his conformation and looks. He has a gentle soul. Things happen for a reason, and God has shown me that I can have another special relationship with another horse. Shaggy’s quiet way of going is what I needed. My Centered Riding journey will continue with him, as I’m sure that there will be many horses in my life that will help me on this journey. I pray that I am able to bring Shaggy to where I had Finny. This sadness that I have with losing Finny will go away some day. I’m hoping Shaggy helps me with that feeling.

I have made mistakes already with Shaggy this past month. One is simple. I got impatient and got after him one day for not picking up his hind feet for me. Now he is scared to pick up his feet. I should have relaxed and did some breathing, but that is what I am doing now. Today he picked up his feet, even though he moved right away. That’s ok, as there is no pressure to do it correct right now. I just don’t him scared to pick up his feet.

The other mistake is taking him into the lope before he was ready to carry me into that lope in a good frame. He is 7 and I wanted him going now. Or so I thought. I don’t need him loping, and loping with collection, by a set date. I don’t need him becoming anxious because I want him to lope. Today, we worked on walk trot transitions and breathing through those transitions. At the beginning of the lesson, Shaggy went from being relaxed and having a level head at the walk to stiff and high headed with being asked to trot. By the end of the hour lesson, he walked and trotted into transitions with a level head. And I have learned that I need to keep him at these transitions until he is comfortable with any walk trot transitions.

During this lesson time with 2 other riders, we worked on the Following Seat, which had us feeling the horse’s movement at the walk. Allowing the hips to move, we were to see if we could feel the front and back movement of the walk, which was easy to do. We were to see if we felt the side to side motion, which I finally “got” recently. At home as I practiced the Backwards Pedaling, I could feel each side of the seat bones moved, first one side pedaled backwards, than the other side. During the lesson, we were to see if we could feel the up and down movement. I didn’t feel that movement.

To feel the front and back movement, we were to picture a large ball moving in our center. This is the Backwards Pedaling motion. We were to picture a watermelon laying on its side for the side to side movement, and take the shape of that watermelon as we pedaled backwards. Then we were to picture that watermelon standing on end, pedaling backwards but up, as in the shape of that watermelon. As the front foot left the ground, you felt the up movement. I got it!

And with the up movement, as I was visualizing that watermelon standing upright, I grew taller. And my horse became lighter on his front end! Light Bulb Moment! His walk was fantastic. He was striding out, relaxed, level headed, AND light on his front end, all with me seeming taller, yet relaxed also.

We had some body work done during the lesson. I had a hip release done, which I love. The hips become more open and the legs seems longer. Once again, the muscles become relaxed and appear longer. Susan showed us a way to move the lower leg in small slow circles which freed up the hip more. She showed us a technique of brushing the lower back, 3 times, then coming over the thigh, ending in a hip release and grounding of the foot. Another thing that I realized was the amount of pressure that Susan used. It wasn’t heavy or hard, but her hand had a certain amount of distinct pressure to it. It was more exact pressure. She explained that after years of experience, she knew the feel. It was clear intent.

Amazing how that felt. I’m not explaining it well, but after I process this and experiment with other riders, I will want to start to develop this feel.

To me, riding horses is a feel. I love passing this feel along to others. I want to develop my feel so that in an instant, riders know that they have been touched by something new and wonderful. Something that will touch their lives and empower their time with horses. I love what Centered Riding is teaching me and how it is affecting my life.

Enjoy your journey, wherever is now and wherever it is taking you. And always,

“Embrace the Journey!”

Sunday, June 13, 2010

Makenzie and her "Pody"

Sara wanted to get a pony for Makenzie. She found a mini in Iowa, just across the border. So on Wed, I went and picked up this little guy, a very fat, black, 30" mini. He is very nice.

I brought the mini to Makenzie yesterday! Makenzie tries to say Pony, and calls him "Pody".


She seems to be saying, "What is this, Grandma?"


Sara, Makenie and her pony.


Look how little they both are.


Shaggy looks like a giant compared to the mini!


Shaggy and mini are best buds already!


Sara wants to put him on a weight lose plan! No wonder!


LOL! He's fat! A little girl needs to be trotting him around, but probably next year!

Thursday, June 10, 2010

The Training Horse Goes Home

I’ve had a good month and a half on the training horse. And it went very well. I love it when the owners come back for lessons and take the time to ride their horse.

I am so happy about how well the horse and owner got along this week. The owner is a beginner, even though his wife has had horses for some time. I think that gives a beginner husband a better start! It has given my hubby a better understanding. He knows what to expect. He knows the horse. He knows and understands horses.

After coming back from the AAHS Clinic, I have begun using some of the principles in my lessons. I talk about the Nature of the Horse and why the horse does what he does. Some of the Secure Seat exercises are about the same for Centered Riding, especially the alignment.

Once we are balanced in our seat, and balanced over our feet, we stay with the horse whenever he moves out from under us. If we are balanced in our seat - that also means we sit evenly on our seat bones - we cam move when the horse moves.

My lessons with the training horse’s owner began with teaching how to Steer, Start and Stop. Then I taught him how to feel the horse’s movement in his body. We did the Following Seat, and allowed the hips to move. Then we did the Pedaling Backwards exercise, and felt when each hind leg hit the ground.

What really made the biggest impact was when I had him turn the horse with his whole body. As he neck reined around, I had him turn with his whole body. He turned his shoulders, waist, and knees as he made a turn. What a difference in control of the horse in the turns. Light Bulb Moment! At least for me if not for him.

I have learned to slow down and allow the rider time to figure out what he is learning! That is what this training horse and owner has taught me!

We need to continue to learn if we have horses, if we ride horses, and if we want to understand horses better. We also need to take the time to ride at leisure. Ride for fun! We don’t always have to be tuning on horses, or riding in a lesson, or riding as if every time we ride has to be perfect.

Enjoy your ride! Enjoy the journey!

“Embrace the Journey!”

Sunday, June 6, 2010

Thoughts Before the Summer Lessons

I start my summer lessons this week. Traditionally, my summer has been filled with weeks of youth lessons, here all morning or until the early afternoon. Over the past few years, instead of week-long lessons, where the kids come every day, the kids have decided to come once a week for a morning, so that they could continue their weekly lessons. They come 1 morning a week for 5 or 6 weeks. Why spend all of their horse time in 1 week when they could have horse time over a 6 or 8 week time frame? Smart kids!

Tomorrow is a day without kids though. Tuesday starts kid’s lessons. Tomorrow, Monday, I need to start my 2 year old, Duster, and teach him all about standing tied. I’ll bring him into the barn with Buster. Yes, isn’t that confusing. But Buster is many years older, and definitely needs to be worked. They both need patience training, and will stand tied in a stall for an hour. Then they both will be free lunged. Then Buster is an old enough to have a saddle put on. Duster is a 2 year old, and may need more time to get desensitized to the pad and saddle.

I have 3 lessons tomorrow. I start with a 2 year old that needs to get used to the saddle. Then I have a lesson with the training horse, and to get the owner more comfortable riding him. Then I have a beginner 8 year old. She is fun!

More later this week. Time to go to bed.

Saturday, June 5, 2010

LB Moment about Using Your Center at the Lope

Another moment I had the other day was when I was going to lope off Shaggy. I
thought about what I had read in the Centered Riding 2 book.

Think about when you were sledding, and for me, that was many, many years ago.
You sat on the sled and someone pushed you to get you started down the hill.

If they pushed your shoulders, where did you go? You went forward, then as the
sled started, your shoulders were flung back and they were left behind your
body. This would be the same as if you leaned forward to lope off.

If the sled was pushed, your upper body was pushed back because your seat was
taken out from under you. This would happen if you kicked the horse to make him
lope.

But what happened if the person pushed you, at your waist, to make the sled go
down the hill? This is the area across your lower back and behind your center.
The sled moves easily and you stay upright. This is the same if you USE YOUR
CENTER TO LOPE OFF! LIGHTBULB goes off brightly!

Now when you are on the horse, use your center, not just your hip or legs, and
definitely not by leaning forward. As I went to lope off Shaggy, I centered
myself, and with my hip and center, I asked for the lope off. Still not pretty,
but my body stayed where it should have. I still have to kick him into the
lope, but I try to use my center as much as I can.

What a moment of clarity!!!

Thursday, June 3, 2010

A Wonderful Lesson

The next LB (Light Bulb) Moment will have to wait for tomorrow. I just had the most wonderful lesson and I have to share! It is a wonderful feeling, for both me as the instructor and for the rider, when the lesson is wonderful!

The owner of the training horse came to ride. He is a little apprehensive about riding, as he is middle aged and haven’t ridden much at all, even though his wife has horses. He just loves the personality of this horse, though, and he really wants to get along with riding him. He is a motorcycle guy, and he was getting frustrated with trying to ride the horse with horse cues and not in motorcycle mode.

Something clicked with me at the AAHS clinic. Or after starting to read the Centered Riding Book 2 on the flight home from the clinic. Whatever it was, worked! Maybe it was due to the fact that I am still tired from 10 days of traveling, 1 day of being very tired here at home, and another day of deciding how to catch up with all the paperwork. When it came to lesson time, I was ready for a break. So I took things slow!

I walked the horse around as I talked about the Nature of the Horse, explaining why the horse does what he does. Then I had him mount and do a couple of exercises to work on sitting correctly. I had him stand in his stirrups and get the straight line from ear to heel. I talked about your center, and what a Tai Chi ball would feel like in your center, small but heavy. I talked about that ball spinning in our center and our center sinking into our seat. The weight of our seat should continue down into our legs and feet and sink into the ground, as we keep the sensation of feeling grounded. As he rode, I talked about the Following Seat, and had him move with the horse, allowing his hips to move freely. I had him pedal backwards and feel each side of his seat move as the horse walked. As he felt the movement and moved with the horse, the horse’s movement became freer and he moved with a deep stride. As he rode, I had him steer with his body, not just his arms. I told him to think about having flashlight beams coming out of his shoulders, waist and knees, and as he turned the horse, to turn with his body. That worked really well to help him turn the horse. He had a great time riding his horse, and the frustrations that we had a few weeks ago were no longer visible. It was an awesome lesson.

Things just clicked with me, too. I felt like that was the best lesson that I ever gave. I was relaxed and watched the rider and his horse. I gave him practice time after each step that I taught him. I know I need to work on giving the riders time to think things through and practice so that they understand the concept. It seemed to work great today. I look forward to our next lesson. Until then,

“Embrace the Journey!”

Happy Birthday to my oldest brother, Ray! Wished we weren’t so far away. Here’s wishing you many, many more years!

Wednesday, June 2, 2010

Light Bulb (LB) Moments

Now I have to start another area of discussion, besides Centered Riding and
Secure Seat Exercises, Training Tips, and Questions. This has to be the Light Bulb (LB) Moments!

My LB Moment came yesterday! I was riding Shaggy, my 8 year old QH gelding who hasn't seen much ride time except 30-60 days each year, and very random. I have been riding him this last month. At the AAHS clinic, we were talking about Unlocking the Lower Back and Standing in the Stirrups and moving with the Horse, then Sitting the Trot and still allowing the movement of the trot to go down your leg and into the stirrups.

Unlocking the Lower Back helps to lower your center of gravity. With all your weight in your seat, pedal backwards as the horse moves. Do not move your leg, but you may appear to be rocking from the waist down. You can lengthen your horse’s stride by pedaling harder, and shorten the stride by pedaling slower. You can turn the horse by pedaling one side. This is the same as the Following Seat in Centered Riding. Allow the hips to move with the movement of the horse.

Standing at the Trot and Moving with the Horse at the Trot, the horse will shift your weight from stirrup to stirrup. The horse’s body moves freer. His gait will become more fluid as his back comes up. As your hip, knees, and ankle joints become more flexible, you will move will your horse more.

Well, finally, after a year of Centered Riding exercises, of the Following Seat, I got it!!! I sat at the walk and I could move with my seat as the horse moved his hind legs. My hips became freer. My seat moved with each gait, and the movement went down in to my legs, through my knees to my feet.

I made a conscious effort to feel the walk stride in my seat, which I always did with Finny. This time, I tried to feel it go into my legs. I think Finny had such a smooth gait is the reason I didn't get the feeling as strong. With Shaggy, he is very true and has a very deep stride, and I could really feel his walk and trot. I could feel as I did the Backwards Pedaling motion, like you should do in the Following Seat and Unlocking the Lower Back, each motion of the pedaling! My seat and legs moved as if the were pedaling. Awesome feeling!!! Try feeling this in your seat before trying to feel it in your knees and legs.

My next LB moment came while I was reading the Centered Riding Book 2 and I
can't wait to share that with you tomorrow!

“Embrace the Journey!”

Tuesday, June 1, 2010

Barn Procedures and Lessons Begins


Last week was the AAHS, the American Association of Horsemanship Safety, Clinic at the Calvin Center in Hampton, Georgia. Brenda H is a very knowledgeable instructor. I appreciated how she presented the information and her willingness to listen to other’s opinions. Gretchen was a wonderful host. I enjoyed catching up with her and watching her ride her beautiful horse, Rainbow. I’ve missed seeing Gretchen and having her here to ride Bubba.

We were extremely busy, from early morning until very late at night, some nights to midnight! The material covered under the topics of Safety and Liability was very informative and important to know. Our lives are forever changed. Even though I have always considered safety and liability, now there are more areas to insure that everyone is safe. I will never forget the helmet video, Every Ride Every Time, that I watched. If anyone wants to see it, it is about 10 minutes long and I will always have it in my horse trailer to show. It will forever change your life. Helmets are important and will change lives, forever.

We learned the importance of a Procedures Manual for the barn. Even if you don’t have a riding or training program, I would encourage you to work on procedures for yourself, and for your friends and family who come to your barn and are around your horses. They need to know how to handle the horse safely and correctly, among other areas of care, like feeding, cleaning stalls, watering, and grooming. The Procedures Manual is an easy way for anyone who is there to do chores, or just coming out to ride, to refer to if they have a question about how to do something.

Lessons will always have a Lesson Plan behind them. Since I give lessons, I will work on this area with a lot of detail. But once again, everyone can do a Lesson Plan for them self. Lesson Plans can help you figure out what you want to learn, then work on that area step by step. Having a plan saves on feeling the frustrations that we feel when we start practicing and nothing is coming together correctly. Once we look at an area that we want to work on, then we break the area down into steps. We think about the how to perform each step. We learn each step one at a time, and we don’t go onto the next step until the previous step is learned correctly. That is the key to learning to ride correctly, and teaching your horse! Do not go onto the next step until you have learned the previous step correctly! Look how much easier it will be to learn. Look how less frustrated you and your horse will be. There is no time frame. Take as much time as you and your horse need. You will be amazed at how much more you and your horse will learn in a shorter amount of time! The journey has begun for you!


I wished we had had more horse time and ride time at the clinic!

Terri, Gretchen and I were able to take a short trail ride before the week started.


But there was just enough hours in the day. I think if we had done 1 more thing, we would have dropped by Friday and would have had no energy for the test on Saturday! We did go back to the barn the first night to practice riding, but with reading assignments each night, quizzes each morning, lesson plans to write, and a practice exam to go through, as well as prepare for the exam on the 5th day, we didn’t elect to go back to the barn again. But we definitely needed the practice time.

I did get my CPR/First Aid certification also, which I need for both this AAHA certification and also for Centered Riding. It was only another 1/2 day in the classroom and 2 more tests! I have no brain left. But I am excited to have recertified and someday, may need to help someone. On the plane ride home, I swallowed a Vitamin C drop, whole, and thought, oh no, am I going to choke! Luckily, the drop continued down and I could relax and breathe. Whew!

This week at home is going to be process week. I think I need to time to think. I will apply what I have learned in my lessons. We were taught 9 Secure Seat skills that I will be teaching, as well as the Centered Riding exercises. With the skills taught, you can't help to develop into a balanced rider, with a secure seat and leg. Now it takes practice time.

And it also take observation time. You may think that you are correct, but it takes another’s eyes to see you. If you are lucky to have mirrors in your barn, then you can see yourself, but someone needs to still see how you are flowing with the horse. I feel that I know how to ride well, and that I know horses well and can read them. One comment to me from the instructor was that I appear as if I’m riding for the show pen. She seemed to imply that I don’t know what to do when the horse does something. What? That comment threw me, and as I sat back and listened to her, I thought to myself, “what do people see when they see me ride?” Sure, the camp horses are old, some are stiff, and some don’t give to the bit, but we weren’t there to tune on the horses. If they came off the rail, I took them back to the rail quietly. I used my hands and leg cues, but I didn’t do it with a lot of movement either. To make myself feel better, I thought to myself, “Are my cues so light that no one sees them? Are my cues strong enough? Do I need to show that I am doing more with my body?” “Do I need to show what I am doing?”

I know that I used to ride without much movement, from sitting quietly for the show pen. But that has changed this last year. My joints are freer and my hips move. I allow my body to move with the movement of the horse. I think what happened to me was that I was at this clinic, learning a new way, and forgot about my Centered Riding. I rode and did what the instructor wanted, trying to do it perfect, and went back to my old way of sitting too quiet. I allowed my hips to move in the Following Seat, but I know I didn’t stand in 2 point and allow my knees to be Dancing Knees. This was an important lesson for me. Do not forget to keep moving with your horse. Relax and allow your body to stay centered, no matter what you are asking of you and your horse.

“Embrace the Journey!” I know I have.

"TRAINING THE MIND OF THE HORSE AND RIDER"

Messick Quarter Horses

Check out my website at: http://www.messickquarterhorses.com/

Lessons, Training and Horse Sales
E-mail me at messickquarterhorses@yahoo.com

Messick Tack & Feed

Messick Tack & Feed
website will be up soon! Click on logo to see current specials!