Pages

Training the Mind of the Horse and Rider

Training the Mind of the Horse and Rider
Click on Logo (Original artwork by Lanie Frick for Messick Quarter Horses. Not permitted to be copied)
Showing posts with label Centered Riding Instructors Course. Show all posts

Thursday, September 8, 2011

It's about Time


It's about time to blog again. I just haven't had the motivation, or time, or topics to blog about. Well, about horses anyways. I could have kept blogging about the grandkids. But I should throw in things about horses every now and then.

I think we all are complaining about how hot and humid this summer was. Oh my goodness, just a week ago, last Wed, Thur and Friday was in the mid 90's, and humid plus!!!  Then all of a sudden, the weekend turned to a pleasant high70's - 80's.  We have had a perfect week, same temps, NO humidity, lovely afternoon and evening hours.

Just about perfect, except I ended up with a head cold. Little bit of a thick throat, then sniffles, now nothing, until night time! Then it's a head cold again. I hope the wine that I'm drinking helps. Otherwise, I've sworm that Baileys does wonders when you have the flu.  And if I have too many more of these evenings, I'm opening up that bottle that I bought last winter, and forgot about, and just found about a month ago!

(oops, hit send instead of save. Oh well.)

What I have done is finally got the momentum back. I'm ready to ride, compete in a few CTR's, and maybe go to another Centered Riding Clinic. I've decided to have a few more dressage lessons this fall.

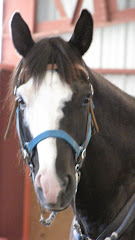
I love riding Shaggy now, my horse I'll ride in Centered Riding Clinics, and Dressage lessons.  And I think I'll start desensitizing him to all thoses things that you need to do at trail challenges.

I say now, because I've always liked Shaggy, from the time he was a baby to a yearling, to a 2 year old. He was never an ugly yearling, like so many yearlings are.  But love. Sometimes Love is learned.

I love his quiet ways. I love his gentleness. I love how he wants to be a friend to all horses. Boy, can't we all learn from him?  Why can't everyone see the good in people like he does?

wow, this topic wasn't going to take this turn, but I guess my thoughts are on Shaggy tonight. I need to do right by him. I need to ride him as well as he rides for me.  I need to give him that chance to be an incredible horse.

And he already is.

His loping is incredible. Maybe next year when I read in my next CR instructor's update, they will see the improvement in how he carries himself.  He does carry himself well and it's up to me to show him all that he can be.

Hang in there with me, Shaggy. Sometimes, I feel like it's just you and me against the world. If we need to ride and strive for perfection to prove ourselves, then we will!!!

Thursday, June 24, 2010

Shaggy in Colorado

The Centered Riding Update Clinic. Enjoy the pics!


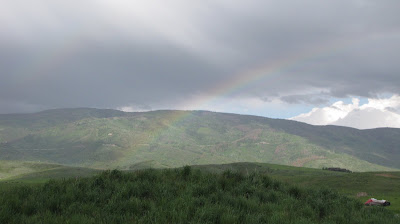
Our Centered Riding Clinic in Steamboat Springs, CO. Beautiful country!


Shaggy in the outdoor arena. Memories of Finny in the same arena come flooding back.


Shaggy is so quiet at the clinic. It is amazing. This is the first time that he has been off the place.


What an arena! Dressage barn with mirrors! But what makes it wonderful is the people! Regina is the perfect hostess. What I love about her is how much she is willing to share, and how much she wants to!


Danicng Knees, but I could have had them bent more,


Sitting the trot down the rail,


Relaxed,


Arena of my dreams!


Bending very nice!


Collecting at the trot,


Trot to Walking transitions,


Posting Trot, and showing off some muscle,


Bending in a Figure 8 Circle,


and finally, the lope departure,

Monday, June 14, 2010

Centered Riding Update Clinic

Day 1

Another June finds me in Steamboat Springs, Colorado for a Centered Riding Clinic. Last year, I was here in June and in August, completing my Level 1 Instructor’s Course with Peggy Brown. This Update Clinic is instructed by Susan Harris. This is 1 of 2 Update Clinics that I will need before August of next year to be able to apply for Level 2 Centered Riding Instructor.

Last year, I had Finny here. I still miss here dearly, and I will always miss “what could have been“. I was so looking forward to where Centered Riding could have taken Finny and I towards a wonderful partnership. We had bonded so well during those summer months of last year, when I started my Centered Riding journey. He was riding beautifully and I was having so much fun with him.

This year, I have Shaggy here. I have raised Shaggy, and from the time we was a weanling, I have always admired his conformation and looks. He has a gentle soul. Things happen for a reason, and God has shown me that I can have another special relationship with another horse. Shaggy’s quiet way of going is what I needed. My Centered Riding journey will continue with him, as I’m sure that there will be many horses in my life that will help me on this journey. I pray that I am able to bring Shaggy to where I had Finny. This sadness that I have with losing Finny will go away some day. I’m hoping Shaggy helps me with that feeling.

I have made mistakes already with Shaggy this past month. One is simple. I got impatient and got after him one day for not picking up his hind feet for me. Now he is scared to pick up his feet. I should have relaxed and did some breathing, but that is what I am doing now. Today he picked up his feet, even though he moved right away. That’s ok, as there is no pressure to do it correct right now. I just don’t him scared to pick up his feet.

The other mistake is taking him into the lope before he was ready to carry me into that lope in a good frame. He is 7 and I wanted him going now. Or so I thought. I don’t need him loping, and loping with collection, by a set date. I don’t need him becoming anxious because I want him to lope. Today, we worked on walk trot transitions and breathing through those transitions. At the beginning of the lesson, Shaggy went from being relaxed and having a level head at the walk to stiff and high headed with being asked to trot. By the end of the hour lesson, he walked and trotted into transitions with a level head. And I have learned that I need to keep him at these transitions until he is comfortable with any walk trot transitions.

During this lesson time with 2 other riders, we worked on the Following Seat, which had us feeling the horse’s movement at the walk. Allowing the hips to move, we were to see if we could feel the front and back movement of the walk, which was easy to do. We were to see if we felt the side to side motion, which I finally “got” recently. At home as I practiced the Backwards Pedaling, I could feel each side of the seat bones moved, first one side pedaled backwards, than the other side. During the lesson, we were to see if we could feel the up and down movement. I didn’t feel that movement.

To feel the front and back movement, we were to picture a large ball moving in our center. This is the Backwards Pedaling motion. We were to picture a watermelon laying on its side for the side to side movement, and take the shape of that watermelon as we pedaled backwards. Then we were to picture that watermelon standing on end, pedaling backwards but up, as in the shape of that watermelon. As the front foot left the ground, you felt the up movement. I got it!

And with the up movement, as I was visualizing that watermelon standing upright, I grew taller. And my horse became lighter on his front end! Light Bulb Moment! His walk was fantastic. He was striding out, relaxed, level headed, AND light on his front end, all with me seeming taller, yet relaxed also.

We had some body work done during the lesson. I had a hip release done, which I love. The hips become more open and the legs seems longer. Once again, the muscles become relaxed and appear longer. Susan showed us a way to move the lower leg in small slow circles which freed up the hip more. She showed us a technique of brushing the lower back, 3 times, then coming over the thigh, ending in a hip release and grounding of the foot. Another thing that I realized was the amount of pressure that Susan used. It wasn’t heavy or hard, but her hand had a certain amount of distinct pressure to it. It was more exact pressure. She explained that after years of experience, she knew the feel. It was clear intent.

Amazing how that felt. I’m not explaining it well, but after I process this and experiment with other riders, I will want to start to develop this feel.

To me, riding horses is a feel. I love passing this feel along to others. I want to develop my feel so that in an instant, riders know that they have been touched by something new and wonderful. Something that will touch their lives and empower their time with horses. I love what Centered Riding is teaching me and how it is affecting my life.

Enjoy your journey, wherever is now and wherever it is taking you. And always,

“Embrace the Journey!”

Sunday, August 23, 2009

Centered Riding Instructor's Course, Level 1 Part 2

August 12-16, 2009

What an experience! I am thrilled with what I have learned! After years of riding, training, and teaching, the freedom of movement has come. Not only to the horse, but to me, as the rider.

I feel like I am a natural rider. I sit the horse with no tension in the body. Legs, arms, and hands are ready to respond to the horse’s movements. Or to the unexpected jump! But from years of riding young horses and older horses with bad habits, there is a tightness in the body through my shoulders and neck. One thing that this week has taught me is that there is years of memory within the body. You may feel relaxed, with no tension, sitting straight, in balance, and body in straight alignment, when actually you are not. I am amazed how I feel when our wonderful instructor, Peggy Brown, had me tip forward a FEW degrees. I felt like I was going to fall forward, when actually I was in alignment. I need to realize that and work on that. I need to learn what my other body parts do when I am tipped back a little. Where do they go? That intrigues me and I will work on that as I ride through this next month.

I have learned to relax my body to ALLOW the hips to follow the action of the horse. This has been the biggest break through on my journey of Centered Riding. After Part 1 of the Instructors Course, I easily learned the “Dancing Knees”. During this riding exercise, while in 2 point position, I allow my 3 leg joints, the hips, knees, and ankles to accept the movement of the horse. Know, in Part 2 f the course, I needed to free up my hips more. And I got it! Well, actually, I got it too well. My body feels like it is moving all over the saddle as my hips move with the horse’s lope motion. My instructor says that this is natural. Riders learn to move, and at first, they move too much. Then, like any balancing act, the body learns to move less and less. The body will finally settle in to the movement of where it needs to be, while staying out of the horse’s way. Yea!!! But know to work on less movement of my body and more natural movement, and one of impulsion, of the horse’s body.

I have learned to straighten my neck - UP! I rode with a “vulture” neck or like a “turtle in the shell” effect. This concept was hard to achieve. I understood how I should look, but getting the look was not easy. One area that Sally Swift enjoyed studying was that of the Alexander Techniques. Alexander is a little bit of stretching, a little bit of meditating, and a little bit of relaxation, all rolled into one technique. As I learn more about the Alexander Exercises, I know my body is going to come into a natural alignment. What I didn’t realize is that with even a few minutes of stretching, how sore your body gets! As I tried to work on my neck through my hour of lessons each day, I became sore through my neck muscles and upper shoulders. I try to stretch and relax every day now. One exercise that helps me, actually 2 exercises, are to stand against a flat wall, feet shoulder width apart and slightly forward off the wall, and stand straight against the wall with the lower back and neck. Another exercise is to lay flat on the floor, with knees bent and a small book under the head. Hands flat against the floor of laying across your midde, and RELAX!

I ride with contact as I work on collection, BUT, as I left go of the tight contact on the reins, and as I rode with a balanced body, my horse’s neck dropped naturally. And with the freer movement of my hips and joints, my horse’s movement was deeper. He naturally drove with impulsion as I freed up my body to get out of his way, to allow his body to do his job. BUT, I felt like even though he was collected, he was strung out, which isn’t possible if he is collected. I think it is just a different feel of collection, with the head and neck down, and out, but not with the nose sticking out. Finny had a much longer neck, and that is what you want. I will work more on his canter this next month, too!

I am so excited to continue this Centered Riding journey! As part of the curriculum, I have to wait 2 years to move on to Level 2. Instructors need time to learn the basics and time to teach what was taught at each level before moving on to the next level. During this time, I will need to continue my own education by continuing with Centered Riding lessons and clinics, as well as auditing and participating in other clinics and workshops.

I will now be using Centered Riding basics and exercises as part of my lessons. So come have a lesson or buy the Centered Riding books and practice with your horse! I’ll enjoy reading your thoughts, what you are doing with your horse, and your accomplishments! Ask me questions and I’ll gladly try to answer them or find the answers!

Come along on the Journey with me!

Thursday, July 2, 2009

Day 3 Centered Riding Instructor’s Course

June 12, 2009

Sometimes, when you are at an event for 3, 4 days, you get drained, and you wished it was over. But Day 3 and everyone is still pumped. No one is even talking like they are brain dead or exhausted. We actually want to ride longer!

Today, in discussion time, we talked about Hind Leg Engagement. The hind leg needs to reach up and under the horse. When the hind leg isn’t engaged, the horse sit’s the foot down and it pushes backward, which is undesirable. The muscles of the back and abdomen need to be strengthen. The back needs to be pushed up from below, (which aids collection).

We discussed further about the Back Peddling motion that we should feel as the horse is moving. Think about the hind leg coming forward. Think about making a circle from the wither to the hind leg. I envisioned a basket ball rotating in my hand, backwards, and I finally got it! I could picture the motion of the horse moving from the withers backwards, down the back to the tail, to the hind legs, and finally being propelled front wards, towards the abdomen. (This is from riding western pleasure horses, and I was taught to push the hind end in, having the horse push off the outside hind to push into the lope). Knowing that the movement comes from the hind legs and comes forward, and learned to see this as the END of the circle and not the start. The START is at the top, backwards and down, then circling back up. I finally got it after a previous 2 day clinic and the 2 previous days here!

With back peddling, we push into contact. This helps to loosen up the hip joints of the horse. We don’t want forward peddling as this could shove the shoulders into the ground (thinking forward and down into the front legs).

With the “Following Seat” motion, we should feel the movement in our knees. Try counting footfalls to feel each separate foot fall. Learn to feel when each hoof hit’s the ground. Learn the feel between the front leg movement and the hind leg movement.

As an instructor, Sally Swift talked about putting 75% of the attention on SELF and only 25% on the student! She said to put 75% on SELF and the other 25% on the horse! If you did these things to yourself, then they would project to the student or to your horse.

Remember to distance yourself from the rider, and the rider’s issues or the horse’s issues, by centering yourself. Don’t allow yourself to be drained. Yet remember to teach from the positive! Teach by centering yourself, be clear, have balance, and be grounded.

Develop an independent seat and an independent balance to have independent hands and arms. A lot of what we learn comes easier as we learn to breathe deeply. Breathe through the entire rib cage and diaphragm. Breathe, as this is how a horse communicates with each other. Therefore, it is important to learn the horse’s language. Understand and respect their nature. Learn what worries them, what makes them happy, what makes them content, what they need.

Breathing helps to calm the horse, and breathing calms us, too! Use breathing as an aid. If you prepare yourself with deep breathing before you ask something of the horse or ask the horse to do something, then the horse will think that you are ok and he does not need to be scared or alarm.

Breathe. Exhale. Drop down into your center. Find your center! Now, breathe, center, AND grow. Grow longer, like a tree that grows deep roots. Growing longer could feel like a half halt to the horse, preparing the horse for something to come. Half halts can be used to wisely prepare ourselves to do something with the horse, or even used whenever we just need to calm ourselves. (even during the hustle and bustle of a busy day!) Half halts can be used to re-center ourselves. Half halts can be our center to regain balance, power, control, peace, calmness, of whatever we need it to be!

Day 3 Riding. We reviewed. We continued to walk and trot while within our bubble. With a leader, and with closed eyes, we concentrated on our “Following Seat”. In 2 point position, we placed our hands on the horse’s shoulder to feel the horse’s movement. Our body is comparable to the horse, and as certain parts of our body moves, so does the coordinating part of the horse moves.

We continued to work on centering ourselves. As the rider, we placed one hand in front of our navel and one behind our back at the same height as the front hand. We rocked our pelvis to find our neutral pelvis. We trotted, found our center, and rode in our bubble. We worked on trot to walk to trot transitions.

To grow into our center, at the walk, we raised one hand into the air. We took our foot out of the stirrup to stretch and grow from our center. Right hand up and right leg reaching down. We repeated the exercise on the other side. Breathe. Center. Grow.

In conclusion of the first part of the first Instructor’s Clinic, we were reminded to read and teach by the Code of Conduct, as Sally Swift taught by. The group will each become individual teachers, becoming 1 of over 800 Centered Riding Instructors.

Sally believed in life long learning! She would want us to continue to grow and learn. Learn from your experience. Learn from everywhere.

Sally is gone now, but her legacy lives on in the style of riding that she taught and lived by. She was, and will always remain, the heart and soul behind Centered Riding. Through her wisdom, she will teach each of us to be a better rider and develop a centered seat. Come along on the ride with me!

Day 2 Centered Riding Instructor’s Course

June 11, 2009

Day 2. I feel comfortable with what I am doing. I am enjoying learning new techniques. Applying what I am learning seems very natural for me to do. I am enjoying developing a better team between me and my horse. My instructor, Peggy, is an awesome teacher!

Today, we are learning about “Dynamic Motion”. Balance in Motion. We work on the “Following Seat” and feeling our seat bones. We concentrate on feeling the lift in the horse’s back and the backward pedaling motion as the hind legs move. As riders work on their balance, they need to help the horse find the horse’s balance. As rider’s tighten up, horses tighten up and lose their balance. Horses can shut down by slowing down or speeding up when out of balance.

We look at our balance through our “Building Blocks”. Our Building Blocks is our (skeletal) alignment. Our joints in our legs are “Springs” and are our shock absorbers. We work on receiving flexibility in our 3 joints, the ankle, knee and hip.

(Did you know that horses do not have a collar bone? Therefore, the shoulder blade is not attached bone to bone, but by ligaments, tendons, and muscles to the front leg).

The atlas joint is at the first cervical vertebrae. The head sits on the atlas joint. If we put our fingers in our ears, the atlas joint is between our fingers, deep inside our head. Can you believe our head is 12-14#s, which is the weight of a fairly heavy bowling ball!

We talked about the Alexander Techniques, which promote Good Balance. Take a “pause” before doing something, Slow down and half halt yourself! Constantly check in with yourself, and slow down!

We took a short break and worked on the mini trampolines. We worked on walking our knees and feeling the movement in the 3 joints. Allow the movement - don’t force it!

We did a strange thing during our riding sessions today! We worked on a Franklin technique. We sat on 2 Franklin balls, one under each seat bone. After riding around like that for about 10 minutes, we removed the balls. You can’t believe how deep in the saddle you felt. It was an amazing feeling!

We worked on “Dancing Knees”. While in 2 point position, we let, allow, the movement of the horse to move our knees and legs. We worked on relaxing and letting the horse move the leg joints.

We then found our neutral pelvis and found our balance point. We were taught to hip release our self, by reaching back behind our leg and pulling our leg back a little. Remember, small steps in moving the leg and stretching out the hip.

We practiced the “Trot in 3 seats”. Posting, 2 Point, and Sitting the trot. We posted first to get in motion with the horse. Then we 2 pointed for about 7 strides, sat for 2 strides and allowed the sitting trot to move us back up into the post. If you totally relaxed at the sitting trot, the horse’s movement really pushes you up into the post. We concentrated on having a good sitting trot, and keeping the horse’s back up by having a good driving seat.

During the ride session, it was important to have some quiet time to work the horse and allow the rider to take in what they are learning. Recognize when you have the feel and when you lose the feel. Learn how to get the feel back!

Use the left brain, thinking and problem solvingside and the right brain, the creative side. Put the rider into the right brain mode through the use of images. Realize what the image looks like, why it looks like that, and what it does to the horse. Sally Swift said, “Let this stuff cook and stew!”

Remember, this is a journey and take the time to enjoy the process! Come along on the ride with me!

Day 1 Centered Riding Instructor’s Course

June 10, 2009

I stayed up past 11 and I was awake throughout the night. This is very similar to every time I go somewhere in my horse trailer for the first night. Wide awake and excited to get started the next day! But I was still up and going at 6 am, feeding Finny and cleaning his stall. Back to the trailer to eat instant oatmeal for breakfast and have some coffee. I dressed in jeans and my boots, later realizing that I was the only western rider, and not in breeches. Oh well. I had time to check email, work on my blog, and go back out to the barn shortly before 8:30, when the other riders began to arrive with their horses.

The morning started at 9 with a continental breakfast, in the lounge/tack room/sitting area. Introductions around, with me from Nebraska, a few people from Kansas, and even a young lady from Alaska! (She is moving back to Missouri/Kansas area in August). Some of the other riders were locals, as at least 7 were from the Steamboat Springs, CO area. We each told a little about ourselves and what some of our experiences have been. Peggy told us about how she got started in Centered Riding, about meeting and having lessons with Sally Swift, and about her recent trip to Japan to teach a clinic!

Our first order of business was to talk about the Centered Riding Policies and Procedures. We have an Instructor’s Code of Conduct that will be very important for us to read. Centered Riding has a standard of guidelines, that all instructor’s need to give lessons by. Sally believed in Life Long Learning and we have a list of suggested reading as well as learning about other riding disciplines.

We reviewed the Basics of Centered Riding:
Soft Eyes
Breathing
Building Blocks
Centering
Grounding
Clear Intent

CLEAR INTENT: knowing what you want to do and how to get there! Have a plan and direction. Look where you want to go. For me, look for where you want to end your trail maneuver.

CENTERING: finding the neutral pelvis. We had balls in our cupped hands. While tipping our hands back and forth, we found the place in our hands that the balls wouldn’t move. We will work on tipping our pelvis while we are in the saddle, and finding that area where we are not tipped too forward or too backward. Our center is moving while we ride. We need to breathe and re-center as we ride.

Everything in our upper body sits in our pelvis. Our pelvis protects our back. Our back is not a shock absorber. AND neither is a horse’s back.

We talked about habits. We have a life of habits. We have some habits that we may not know that we have until we try to change them! We talked about the dominance factor. Which eye, ear, foot, hand is the dominant one? Which seat bone do you sit on? We need to recognize which may be dominant so that we can become more balanced and equal.

We have “Dynamic Balance”. Balance in Movement. The rider can help balance the horse, depending on how we sit. We need to consider what is functional, and ride for function, not ride a way that looks good only.

“GROUNDING: awareness of our feet on the ground. We have balance receptors in our feet. We are more secure when we feel our whole foot, both on the ground and on the stirrup. Our balance point on our foot is actually further back on our foot than we think. The point is behind the digit joints of the foot.

Enough for the first classroom discussions. After a wonderful lunch, we started our riding sessions. 3 groups of 2 or 3 riders rode for 1 hour and 15 minutes during the afternoon. Before the riding sessions, we talked about saddle fit. We did the “chap stick test”. Laying a chap stick on the saddle, does it roll back or front of lay in the middle of the seat? This is a good way to see if the saddle sits level on the horse’s back.

Our riding groups worked on grounding their feet, hip releases, and walking the knees. For grounding the rider’s feet, we rested our hands on the rider’s ankle, after asking permission to touch them. We learned to breathe and become grounded our self. Tap the rider’s heel, instep, and toe, then find that spot on the bottom of the rider’s foot where the tapping feels different to the rider. That is the spot where the foot should rest in the middle of the stirrup, making the rider grounded. As you ride, be aware of your feet! If we are grounded as riders, our legs feel like they are around the horse and you are feeling your legs reach to the ground.

Riders have 3 springs: hip, knee, and ankle. Our leg joints! We were taught how to release the rider’s hips, allowing the hip angle to open. The hip release allows up to sit on our seat bones correctly. The end of the femur has a ball that sits inside the hip joint. This balls lies to the back of the socked. During the hip release, we roll the ball to the front of the socket. The muscles in the back of the pelvis need time to stretch so we may not feel or see much of the movement - it takes time!

Riding the 2 point position takes the pressure away from the seat bones, while balancing on the foot. Rely on the stirrups to support the weight of the body, not the knees! We practice posting the trot, then 2 pointing then sitting for a few strides and going right up into the posting trot again. While in 2 point position, relax the joints and allow the knees to spring.

While walking, feel the same relaxed, released knee action. Allow the knees to “walk” as the horse is walking. Mimic the horse’s movement. The horse equates relaxation with out-breaths. Breathe. Exhale. Feel the horse relax. As the horse relax, feel, with soft eyes, the relaxation in your legs. Allow the horse’s movement to move the knees.

Remember: take your time. Centered Riding is a journey! Come along and ride this journey with me!

Saturday, June 20, 2009

Centered Riding Instructor’s Course, Level 1, Part 1


June 10-12, 2009
Steamboat Springs, Colorado

Driving from Cheyenne to Laramie, and then on to Steamboat Springs, Colorado, I felt like I was driving through the Old West. The scenery was beautiful. Snow capped mountains. Aspens starting to leaf. Wooden structures. Old time scenery. Old West came to life! And did I say mountains? And drop offs, with no guard rails?

I couldn’t believe the climb out of Laramie to the south. I have been in flat Nebraska too long, and have forgotten what the mountains seem like. The truck was pulling hard, and it has a BIG engine. I took the overdrive off and we got up the FIRST incline! To find that we were at the Continental Divide and was going over Rabbit Ears Pass. Rabbit Ears Pass? What did that mean? It meant 7 miles up and 7 miles down of twist and turns!!!! Just let me say that when I got to the barn, I needed about a gallon of water, since I was so dry! or a stiff drink, since I was so strained!


The views were breathtaking! Sorry no pics, as my hands were glued to the steering wheel, and my eyes were glued, most of the time, to the middle of the road! I tried really hard not to look over the edge of the mountain! I have a few pics, but when I finally pulled over on the way home to take pics, it had started to rain, but I’ll post some of those. When I go back in August, hopefully my husband will be with me so he can drive and I can shoot pictures of those mountains!

I finally made it to the stable, after a few missed roads, AND people who were so rude that they passed me to the inside as I was trying to turn! And drivers who wouldn’t let me back up to turn around! Oh, I was so glad to get to that barn!

The temps were a lot colder than what I had expected. I had packed for summer, and it was still winter here! Finny had a stall, and he was even closed in most of the day and definitely at nights! I wore winter jackets. And to think that the previous weekend I was in such heat and mugginess that I needed extra water! I froze the first day! Even when we were inside the heated meeting/lunch room. It was a good thing I still had heavy sleeping bags in my trailer. When the heat went off for the night (since I was heating with propane, I didn‘t leave the heater turned on all night), the sleeping bags went on the bed! Each night, I put one more layer on the bed, and I slept in one more layer!

I was the only person bringing a horse that needed to stay over. So the first evening was pretty quiet. After the 4 hour drive from my daughter’s place to the barn, I turned Finny into the arena. And what an arena it was! Large, at least 70 or 80 x 150-180. Mirrors down the one side, ½ ways up the wall, (the bottom half was plywood, at an angle to keep horses away from the sides of the wall!), and mirrors on each end as you come down the rail, so the rider can see themselves. Finny was fascinated with the horse that looked like him and walked or stood beside him on that rail. During turnout, I think Finny stood beside the mirrors all the time! LOL.


What a barn. Immaculate! Beautiful wooden stalls, wood everyone, beautiful tack/lounge area. I wondered if I should have taken off my boots when I went into the bathroom! Great outside turnout pens. And a very gracious hostess! Thank you so much for opening up your barn to us!

After putting a bag of bedding in Finny’s stall, I hung 2 buckets of water and a bucket with his salt block in it. I gave him a generous amount of hay. I brought him out of the arena and put him into his new home for the next 3 days! He loved it!

The Instructor’s Clinic was wonderful! Peggy Brown is so knowledgeable! I look forward to learning more from her. I will post, in separate posts, what we did each day of the 1st half of the Level 1 Instructors Course. I have already started teaching some lessons, using some of the principles that I have learned, and I will post about those too!

I’m looking forward to hearing from you. Please post your comments or, if you prefer, send me an email to messickquarterhorses@yahoo.com. But feel free to post on the blog. I’m sure others may have the same questions or thoughts as you!

Tell me what you would like to learn or what you have learned by using the Centered Riding Techniques. Share what you are doing with your horse and what else has helped you to develop your riding and your partnership.

I am so excited to start this “journey” and continue on! If you are interested in a chat group to talk about Centered Riding, training techniques and questions, discussion on what has worked for you or what you would like to try to see if something different works, please let me know through the email above! I am thinking about starting a group to share our knowledge, so let me know if you are interested! Otherwise, post your thoughts as a new blog comes up!

I look forward to hearing from you. Maybe one of these days, we’ll get out on a trail together! Come along on this ride with me!

"TRAINING THE MIND OF THE HORSE AND RIDER"

Messick Quarter Horses

Check out my website at: http://www.messickquarterhorses.com/

Lessons, Training and Horse Sales
E-mail me at messickquarterhorses@yahoo.com

Messick Tack & Feed

Messick Tack & Feed
website will be up soon! Click on logo to see current specials!